


⚡ TL;DR: This article reveals common shortcuts in asphalt shingle roof installation that Minneapolis pros take, like skimping on ice shields and ventilation, and offers tips to ensure lasting protection.
📋 What You’ll Learn
Uncover the asphalt shingle roof secrets Minneapolis pros hide, from ice dam defenses to nailing pitfalls, ensuring your Twin Cities home stays protected in harsh winters.
- Expose skimping on ice & water shield – the top vulnerability leaving Minneapolis roofs prone to leaks and ice dam disasters during severe freeze-thaw cycles.
- Decode lazy nailing patterns that cause granule loss, shingle blow-offs, and hidden leaks pros use to cut corners on your installation.
- Avoid ventilation shortcuts triggering ice dam nightmares, attic rot, and energy waste common in Minnesota's brutal winter conditions.
- Unmask the starter shingle scam rushed contractors deploy to speed jobs while compromising edge strength and overall roof longevity.
- Master pro tips for quality checks via case studies and demands to spot failures early and secure durable asphalt installations.
📖 Reading time: 7 min
✍️ Author expertise: Minneapolis roofing pro with 25 years of hands-on asphalt shingle installs in MN winters.
Ever wonder why your neighbor's asphalt shingle roof in Minneapolis looks pristine after five brutal Minnesota winters, while yours starts shedding granules after just two?
Local roofing pros won't tell you it's not the shingles themselves, but three sneaky installation tricks they skip to cut corners and boost profits.
These hidden moves mean the difference between a roof that laughs at ice dams and one that leaks like a sieve come spring thaw.
Grab a coffee and dive in, because I'm pulling back the curtain on what the experts in Minneapolis keep under wraps.

Secret #1: Skimping on Ice & Water Shield – Minneapolis' Biggest Vulnerability
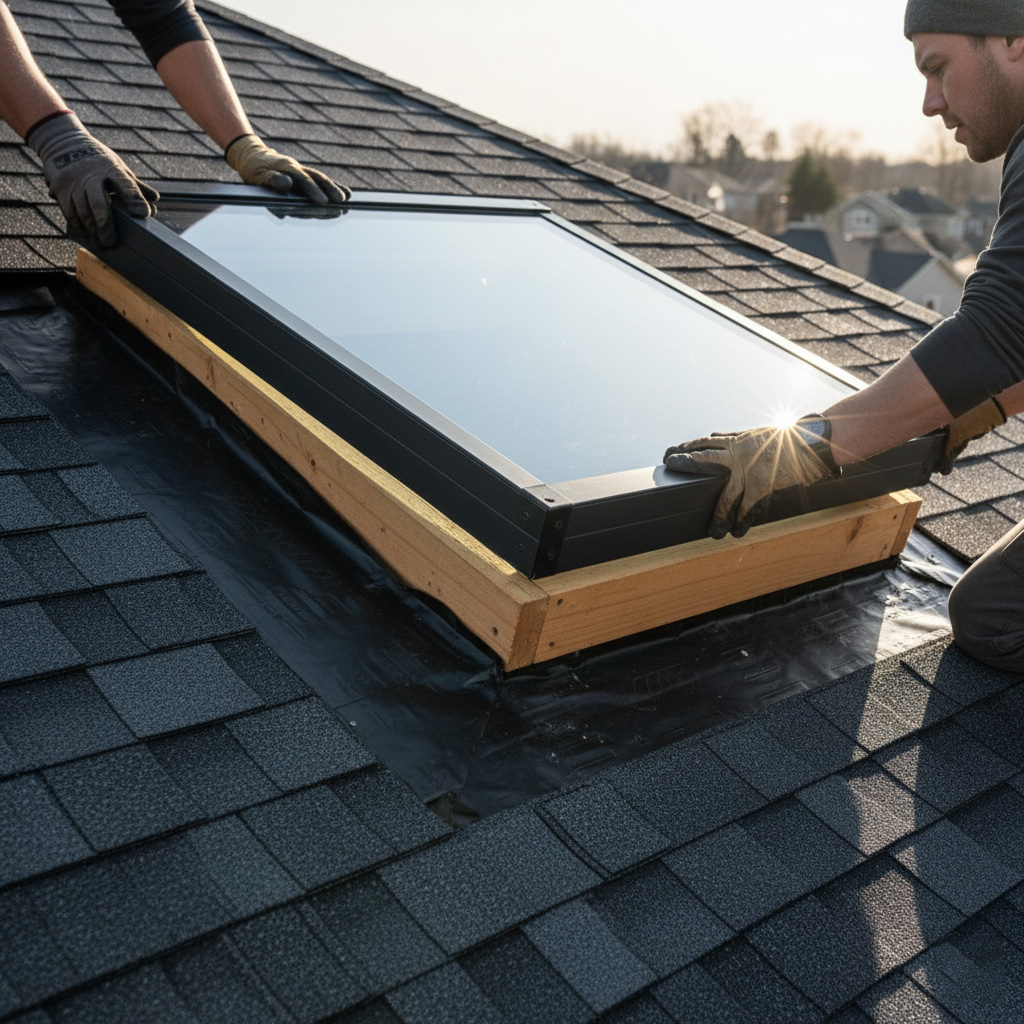
Picture this: Minnesota's freeze-thaw cycles turn your eaves into ice dam factories. Ice & Water Shield – that sticky, self-sealing membrane – is your roof's frontline defense. It goes under shingles in vulnerable spots like eaves, valleys, and around chimneys to block water sneaking under during those brutal winters.
Shady pros in Minneapolis slap it on just the edges, maybe 3 feet max, to slash costs and speed up the job. Code says full eaves coverage, but they pocket the savings. Result? Ice dams punch through, water creeps in, and your attic turns into a swamp by spring.
- Check invoices for "full ice dam protection" – not vague "shield."
- Insist on photos of the membrane before shingling starts.
- Real pros use it everywhere ice forms, period.
Skip this, and you're betting your home against Lake Minnetonka-level ice buildup. Demand it right, or watch leaks eat your equity alive.
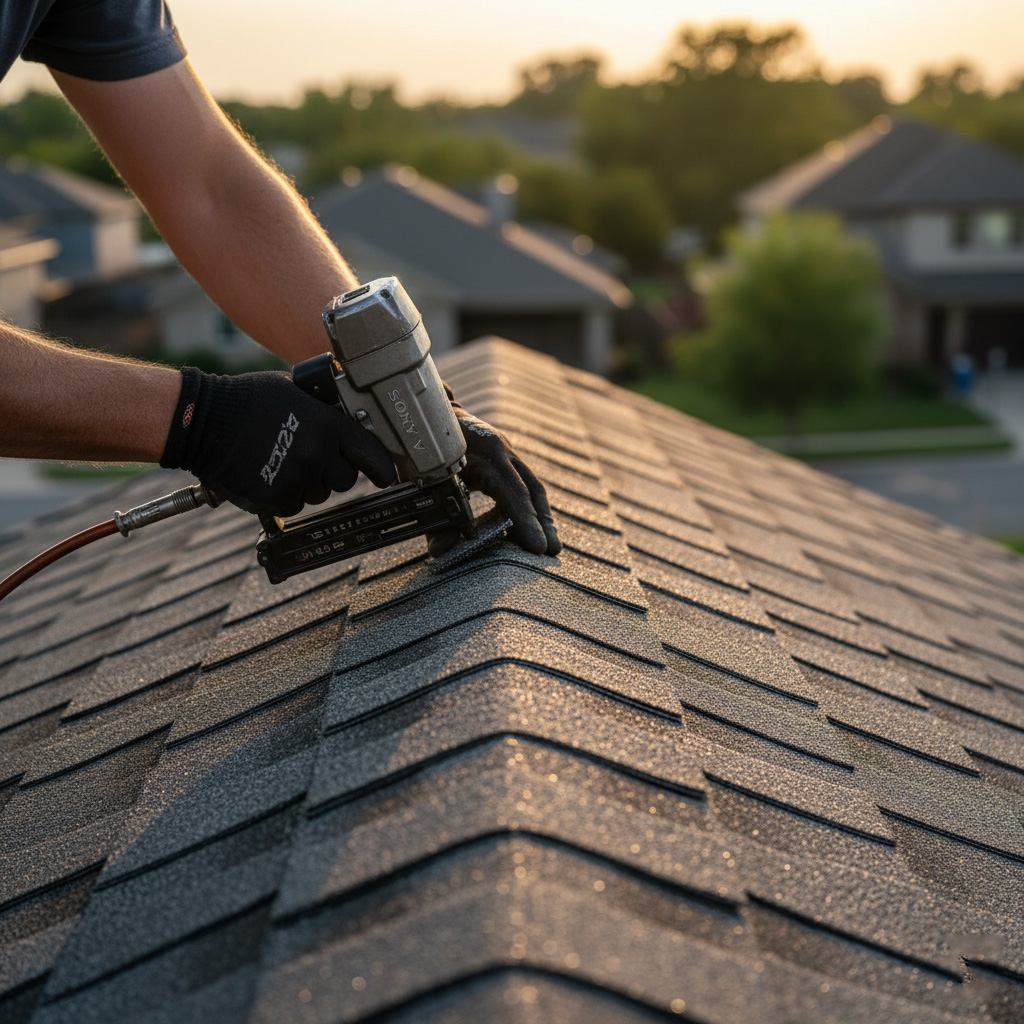
Secret #2: Lazy Nailing Patterns That Trigger Granule Loss and Leaks
Picture this: wind whipping through Minneapolis at 50 mph, yanking at your shingles like a toddler with a bad temper. Shoddy roofers nail just enough to pass a quick glance, skipping the critical six-nail pattern that locks everything down tight.
Result? Shingles lift. Granules rain down your gutters. Water sneaks in, rotting your decking before you spot the first leak.
The Right Way vs. The Lazy Way
- Pro Pattern: Six nails per shingle, placed exactly 1-2 inches from edges and 6-8 inches apart. Hits the nailing zone every time.
- Sloppy Shortcut: Four nails, slapped in haphazardly. Saves them 10 minutes per square, costs you thousands in repairs.
Up here in Minnesota, freeze-thaw cycles make it worse. Loose nails pop free, turning a solid roof into a sieve by year three.
Spot granule buildup in gutters early? Demand a nail audit. Your roof will thank you when the next blizzard hits.
Secret #3: Ventilation Shortcuts Leading to Ice Dam Nightmares
Picture this: snow piles up on your roof all winter. Then spring hits, and bam – ice dams form, water sneaks under shingles, and your ceilings turn into a drip fest.
Why? Roofers skip proper ventilation to save time and cash. Heat from your attic melts snow from below. It refreezes at the edges. Disaster.
The Quick Fix They Push (And Why It Fails)
No full soffit-to-ridge airflow system. Instead, they slap on a few cheap vents and call it good.
- Missing soffit vents at the eaves? Warm, moist air traps inside.
- Half-assed ridge vents? Exhaust stalls, moisture builds.
- Blocked intake with insulation? Forget balanced airflow.
Result? Premature shingle rot and ice dam hell every Minnesota thaw.
Demand at least 1 square foot of net free ventilation per 150 square feet of attic space. Split it 50/50 intake and exhaust.
Insist on continuous soffit vents and a full-length ridge vent. Your roof will breathe easy through blizzards.
The Overlooked Starter Shingle Scam Pros Use to Rush Jobs
Picture this: your roof's edge, that critical first line of defense against Minnesota's howling winds and ice buildup. Shady contractors slap down cut-up field shingles as "starters" to save a few bucks and minutes. No self-sealing sealant underneath. No proper overhang. Just a half-baked hack that dooms your roof from day one.
Proper starter shingles? They're factory-made beasts with thick sealant strips that glue down tight, locking out water and wind. Skip 'em, and you invite edge leaks that rot your eaves. In Minneapolis, where gusts hit 60 mph, this shortcut turns your roof into a sail ready to rip off.
Spot the Scam Before It Hits Your Wallet
- Ask for photos of the starter row before shingles go up – real starters look uniform, not ragged cuts.
- Demand manufacturer-approved strips, not DIY slices from scrap shingles.
- Check the invoice: legit jobs list starters separately, not buried in "shingles."
Rushed pros love this trick because it's invisible under the first course. But come first storm, you'll pay big to fix it. Insist on the real deal, or watch your investment peel away.
Case Study: Rescuing a Twin Cities Home from Shingle Failure
Picture this: A family in Edina, just outside Minneapolis, calls us after their asphalt shingle roof turned into a granule-shedding mess. Winter ice dams had punched through, flooding the attic. Their "pro" installer had rushed the job two years prior, leaving a disaster waiting to explode.
What We Uncovered
- No ice and water shield under the first three rows – exposing the deck to Minnesota's freeze-thaw cycles.
- Lazy nailing: Nails hit every six inches horizontally, but way too high on the shingle, causing slippage and leaks.
- Zero ridge venting, trapping heat and moisture for epic ice dams.
We tore it off. Found rot eating the sheathing. Total replacement? Under $20K, versus the $50K nightmare if they'd waited.
Fast-forward six months: Roof's battle-tested through another brutal winter. No leaks. No granules in the gutters. Family's sleeping sound, bills low.
Lesson here? Spot the shortcuts early. Demand proof of proper install. Your wallet – and sanity – will thank you.
Pro Tips: Spotting and Demanding Proper Asphalt Installation
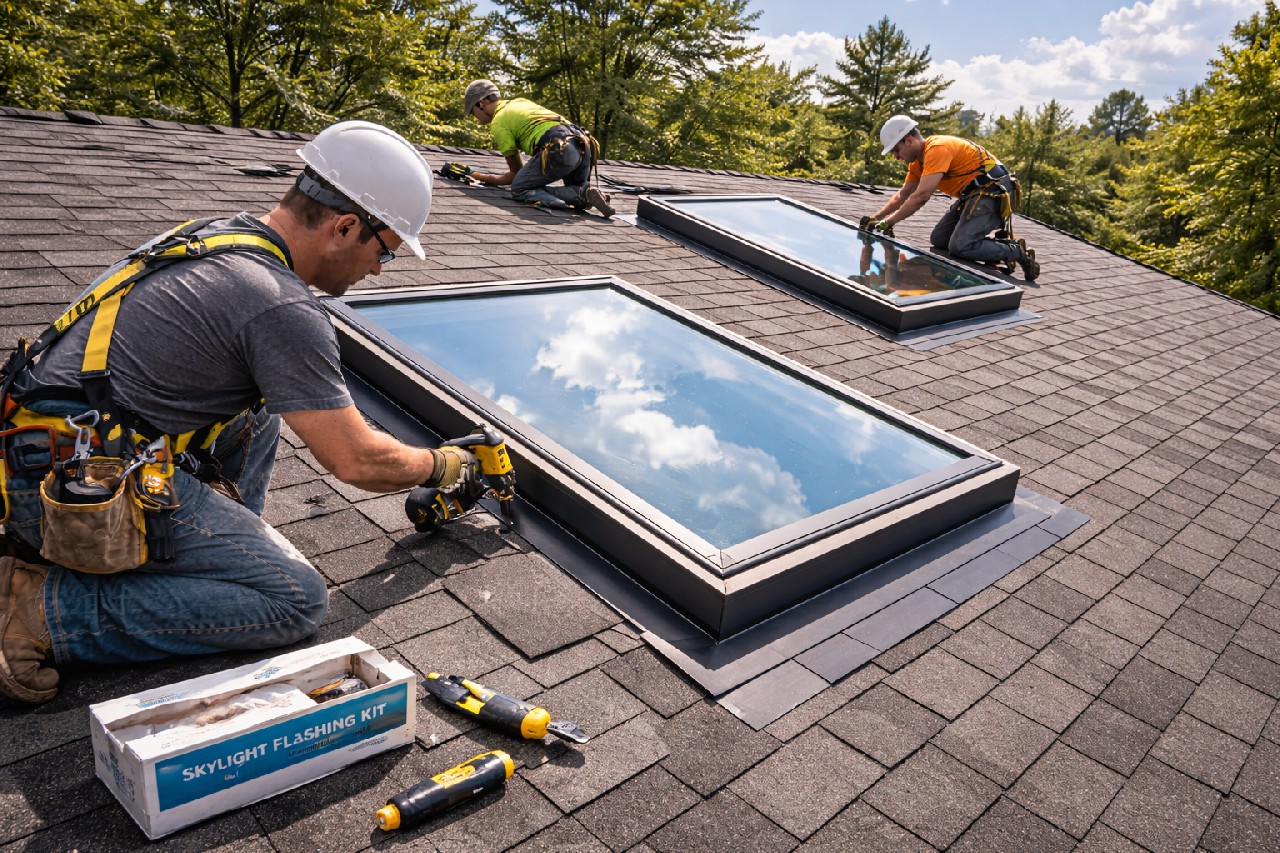
Before you sign that contract, get your eyes on the job site. Insist on a walk-through mid-install. Spot the shortcuts yourself, or hire an independent inspector for $300 that could save you $10,000.
Key Checks for Ice & Water Shield
- Shield must run full eaves edge to drip edge. No gaps over 1 inch.
- Look for it wrapping up valleys at least 18 inches both sides.
- Demand photos of the underlayment before shingles go on.
Skip this, and you're rolling the dice on Minnesota's next ice dam.
Nailing and Ventilation Red Flags
Proper nailing means six nails per shingle in high wind zones like ours. Nails hit the shingle's field, not just edges. Too few or crooked? Walk away.
- Vents: Soffit intake plus ridge exhaust. At least 1 sq ft per 150 sq ft attic.
- Starter strip: Double-layered, no exposed nails.
Tell your roofer: "Show me the pattern, or show me the door." It works every time.
Final Thoughts
Your roof isn't just overhead protection. It's your first line of defense against Minnesota's freeze-thaw cycles. Skimping on these basics turns a solid investment into a money pit.
Demand the right work. Next time you're eyeing a quote, grill them on ice dam shields, nailing schedules, and ridge vents. No shortcuts allowed.
Quick Checklist Before Signing
- Verify full ice and water shield coverage in valleys and eaves.
- Insist on 6 nails per shingle, staggered properly.
- Confirm balanced intake and exhaust ventilation.
- Ask for starter shingles with proper overlap – no cheap rolls.
Spot these in action? You've got leverage. Dive deeper into proper techniques with our guide on Asphalt Shingle Roof Installation. Your home deserves it.
People Also Ask
What is the biggest secret roofing pros in Minneapolis hide about asphalt shingles?
Many pros skimp on ice and water shield application, especially in vulnerable eaves and valleys, to cut costs and speed up jobs. This leaves Minneapolis homes exposed to harsh winters, ice dams, and leaks that cause major damage. Insist on full coverage as per local building codes for long-lasting protection.
Why do asphalt shingles lose granules prematurely in Minneapolis?
Improper nailing patterns, like using too few nails or placing them incorrectly, cause shingles to shift and shed granules faster. Harsh Minnesota weather accelerates this when shingles aren't secured properly. Check for 4-6 nails per shingle in a straight line to ensure durability.
How can poor ventilation lead to ice dam disasters on shingle roofs?
Inadequate attic ventilation traps heat, melting snow during the day and refreezing it at night to form ice dams. Minneapolis pros sometimes shortcut soffit and ridge vents to save time. Proper intake and exhaust vents prevent moisture buildup and extend shingle life.
What is the starter shingle scam in asphalt roof installations?
Some contractors use cheap, inverted starter shingles or skip them entirely to rush the job, leading to wind uplift and early failure. In windy Twin Cities conditions, this compromises the entire roof edge. Demand high-quality, properly aligned starter strips for a secure base layer.
How to spot and avoid bad asphalt shingle installation in Minneapolis?
Look for uneven shingle alignment, exposed nails, or insufficient ice dam protection during inspection. Ask for detailed photos of underlayment and nailing before final payment. Hiring certified local pros with warranties ensures compliance with Minnesota's severe weather standards.
Minneapolis Roofing delivers roofing services across Minneapolis, MN. With extensive experience in installations, repairs, and maintenance, the team handles residential and commercial projects. Rooted in the local community, Minneapolis Roofing focuses on quality craftsmanship tailored to the area's climate and needs.
Need Roofing?
Fast roof repairs and replacements deliver leak-free protection in Minneapolis, MN and nearby areas. (55401, 55403, 55408, 55412, 55419)
Get Roof Quote